Congrats! You have made the first great step in promoting a small business or your freelancing. Or you just want people to read what you have to say. Either way you are in the right direction. There is a simple way that you can setup your very own personalized blog.
I bet you have some questions that need some answers first though. Like what a blog is. Well it’s a way to pull in clients to your business. Now not every person who reads your blog will become a client, but it is a good practice to get in the hang of.
Now let’s get into a technical answer on what a blog is. A blog is made up of blog posts. Like articles, how to’s, or even just your thoughts for the day. It can be anything you want to write about and have other people read. You typically would publish a blog once a week to keep it active. All these posts that you write on your own WordPress website and it lets you customize it the way you want. This step by step guide you are reading right now is a blog post.
Now that you have the gist of it. Let’s get into how to set yours up.
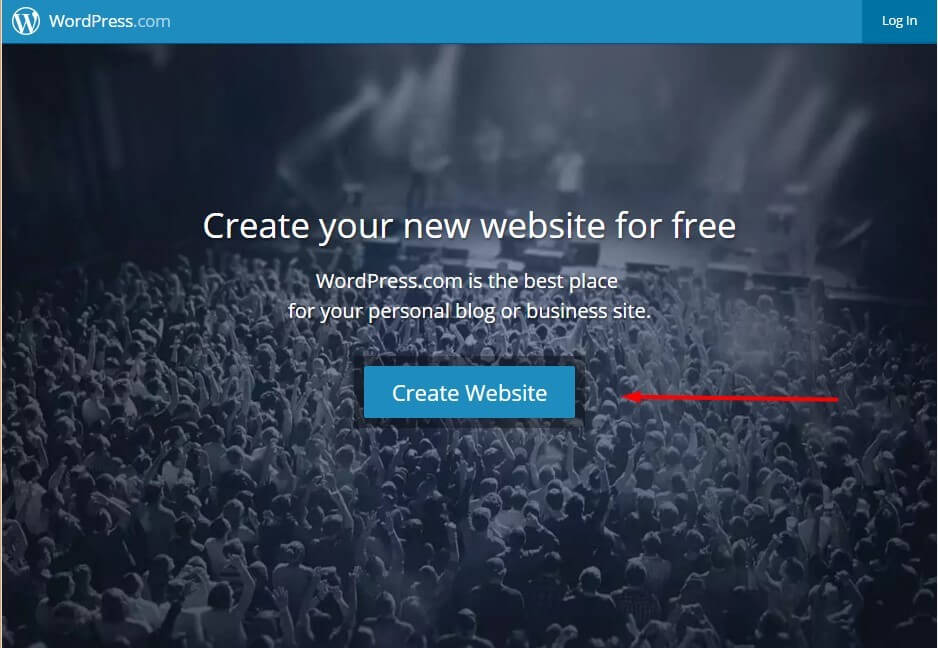
Step One: Visit WordPress.com
So you will need an email address to sign up for wordpress. When you get to the WordPress click on Create Website.
Step Two: Choose A Theme
A theme is a style of how you want your website to look like.
They have many different themes. You can choose one of them or just skip. But I would recommend choosing one right now that way you can get the feel of it… You can ALWAYS change your theme later.
 Step Three: Choose a Custom Domain, or a Free .wordpress.com Address
You can choose to buy a domain or just use the free .worpdress.com site. In this case you would want the WordPress site so you won’t have to pay anything.
 Step Four: Choose A Plan
Now this is rather new. But you will want to stick with the Free for Life plan. You can choose to purchase one if you want to create a website with your own domain, a lot more customization, support, audio and video, but really for a blog you just need the free version.
Step Five: Create Your Account
Here you will provide your email address, choose a username and a password. Now write down your username and password because you will use this to login to your site.
Step Six: Verify Your Email Address
 You will need to verify your email address in order to keep using your site.
 Step Seven: Now this is the Final Step…. Create Your First Blog Post
Here you can add a title of what you want your post to be. You will type in what you want (or if you already have one written just copy and paste). You can add an image or change the formatting. When you are finished just hit publish and it will be on your blog for other people to read!
Once you have finished creating your free blog comment your URL and I will be happy to go check them out!! Happy blogging everyone and I hope you learned a lot from this Step by Step guide!
